How to Add Microsoft Clarity to Next.js (Zero Impact): The Ultimate Guide


1. Introduction — The Need for Visual Analytics
If you are a web developer or a business owner trying to improve website conversion rates, you have likely stared at Google Analytics graphs wondering, “Why are users bouncing off this page?” Numbers can tell you how many people visited your website, but they completely fail to tell you what those people actually experienced while they were there.
To truly understand and enhance the user experience, you need visual data. You need to see exactly what your users are seeing. This is where Microsoft Clarity comes in. Clarity is a completely free, highly powerful behavioral analytics tool that provides live session recordings, heatmaps, and dead-click tracking.
However, there is a catch. When you start Next JS project development, your primary goal is speed. Next.js is renowned for its blazing-fast server-side rendering and perfect Core Web Vitals. Injecting a bulky third-party JS script the wrong way can instantly ruin your Lighthouse scores and harm your SEO.
In this comprehensive guide, we will walk you through exactly how to safely and efficiently add Microsoft Clarity to a modern Next JS app (specifically using the App Router). We will cover everything from adding website details to the dashboard, finding the correct tracking code, implementing it via the official Next JS docs, and finally performing your next js deploy to Vercel.
2. Why Choose Microsoft Clarity for Your Next JS Project?
Before you decide to embed tracking into your js project, it is crucial to pick a tool that aligns with your goals. There are many analytics platforms on the market, such as Hotjar or CrazyEgg, but Microsoft Clarity stands out for several undeniable reasons:
- It is 100% Free Forever: Unlike competitors that restrict you to 1,000 recordings per month or put their best features behind a massive paywall, Clarity is completely free. There are no traffic limits, no data caps, and no premium tiers.
- Extremely Lightweight: Speed is everything when you make your website. Microsoft designed Clarity to be minimally invasive. It won't block your browser's main thread, meaning your animations will stay smooth and your page load times will remain fast.
- Advanced AI Insights: Clarity doesn't just record video; it categorizes it. It automatically identifies "Rage Clicks" (when a user angrily clicks an element that isn't working) and "Dead Clicks" (when a user clicks something they thought was a link, but isn't). This makes it incredibly easy to debug your user website UI.
- Seamless Integration: Moving js to app frameworks like Next.js can sometimes be tricky with legacy scripts, but Clarity works flawlessly with modern React paradigms.
3. Understanding the Impact of Third-Party Scripts
When you deploy your website, Google’s crawlers immediately start analyzing your Core Web Vitals. Metrics like Largest Contentful Paint (LCP) and First Input Delay (FID) are critical for your search engine rankings.
If you casually paste a raw
<script> tag into the <head> of your HTML document, the browser will stop rendering your beautiful Next.js UI until it finishes downloading and executing that analytics script. This is known as "render-blocking JavaScript."To avoid this, we must leverage the power of the Next JS ecosystem. By using the
next/script component, we can tell the browser precisely when and how to load the Clarity tracker. We want to ensure that the user gets to see and interact with your site immediately, while the analytics tracker quietly boots up in the background.4. Step 1: Create an Account and Add Your Site
The very first phase of this integration is setting up site profiles on the Microsoft Clarity platform.
- Head over to the official Microsoft Clarity website and create a free account. You can use a Microsoft, Google, or Facebook account to sign in quickly.
- Once you bypass the register page and log in, you will be greeted by a clean dashboard. Click on the button that says Add New Project.
- A modal dialog will appear on your screen. Here, you simply need to add your site name and the primary URL of your website.
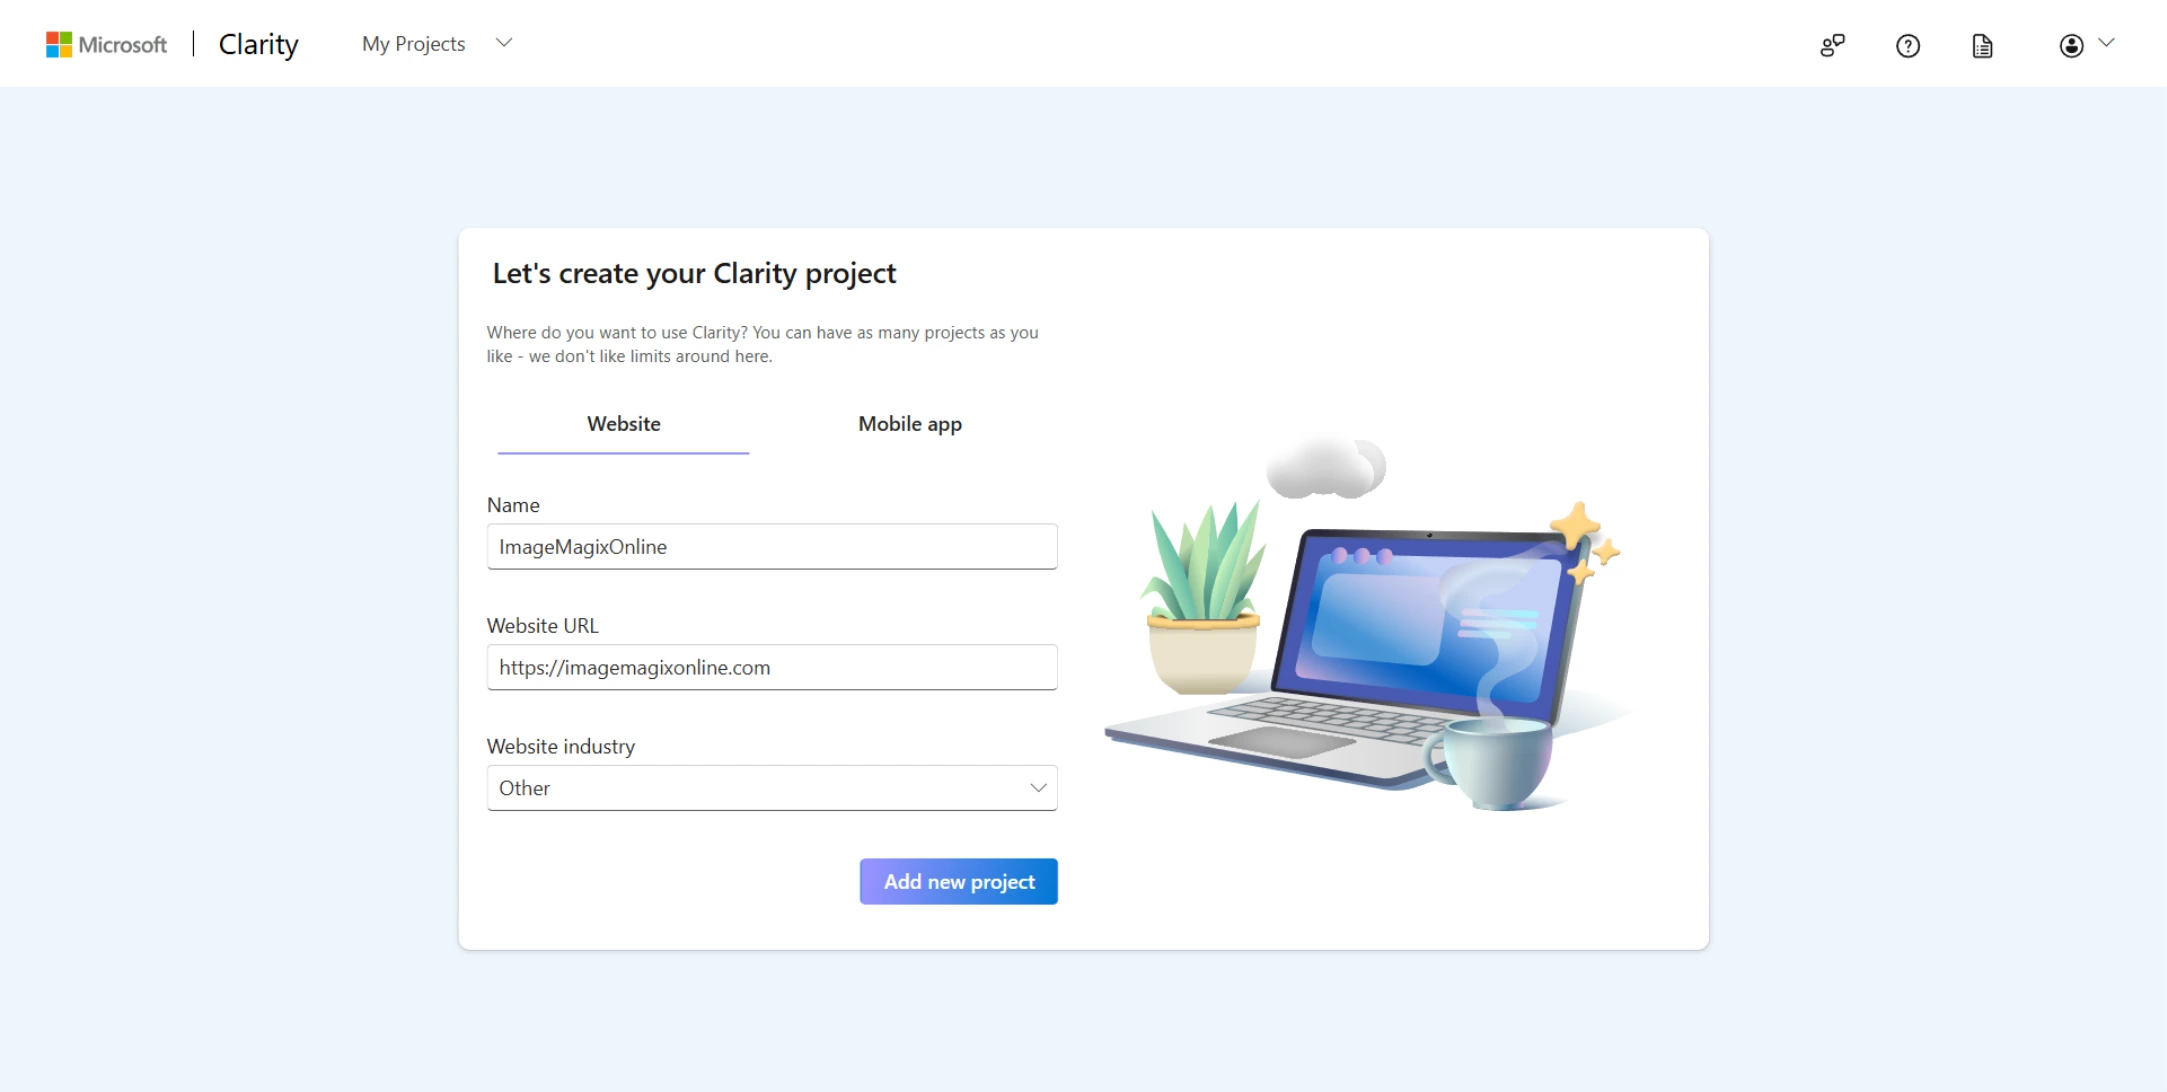
As you can see from the image above, adding site credentials is a breeze. Just click Add new project to proceed to the next step.
5. Step 2: Retrieve Your Tracking JS Script
Immediately after you add your website, Clarity needs to give you the unique identifier so it knows where to send the data. It will prompt you asking how you prefer to install the tracking code.
- On the "Almost There!" screen, bypass the third-party integrations and look for the middle box that says Install manually.
- Click the blue button labeled Get tracking code.
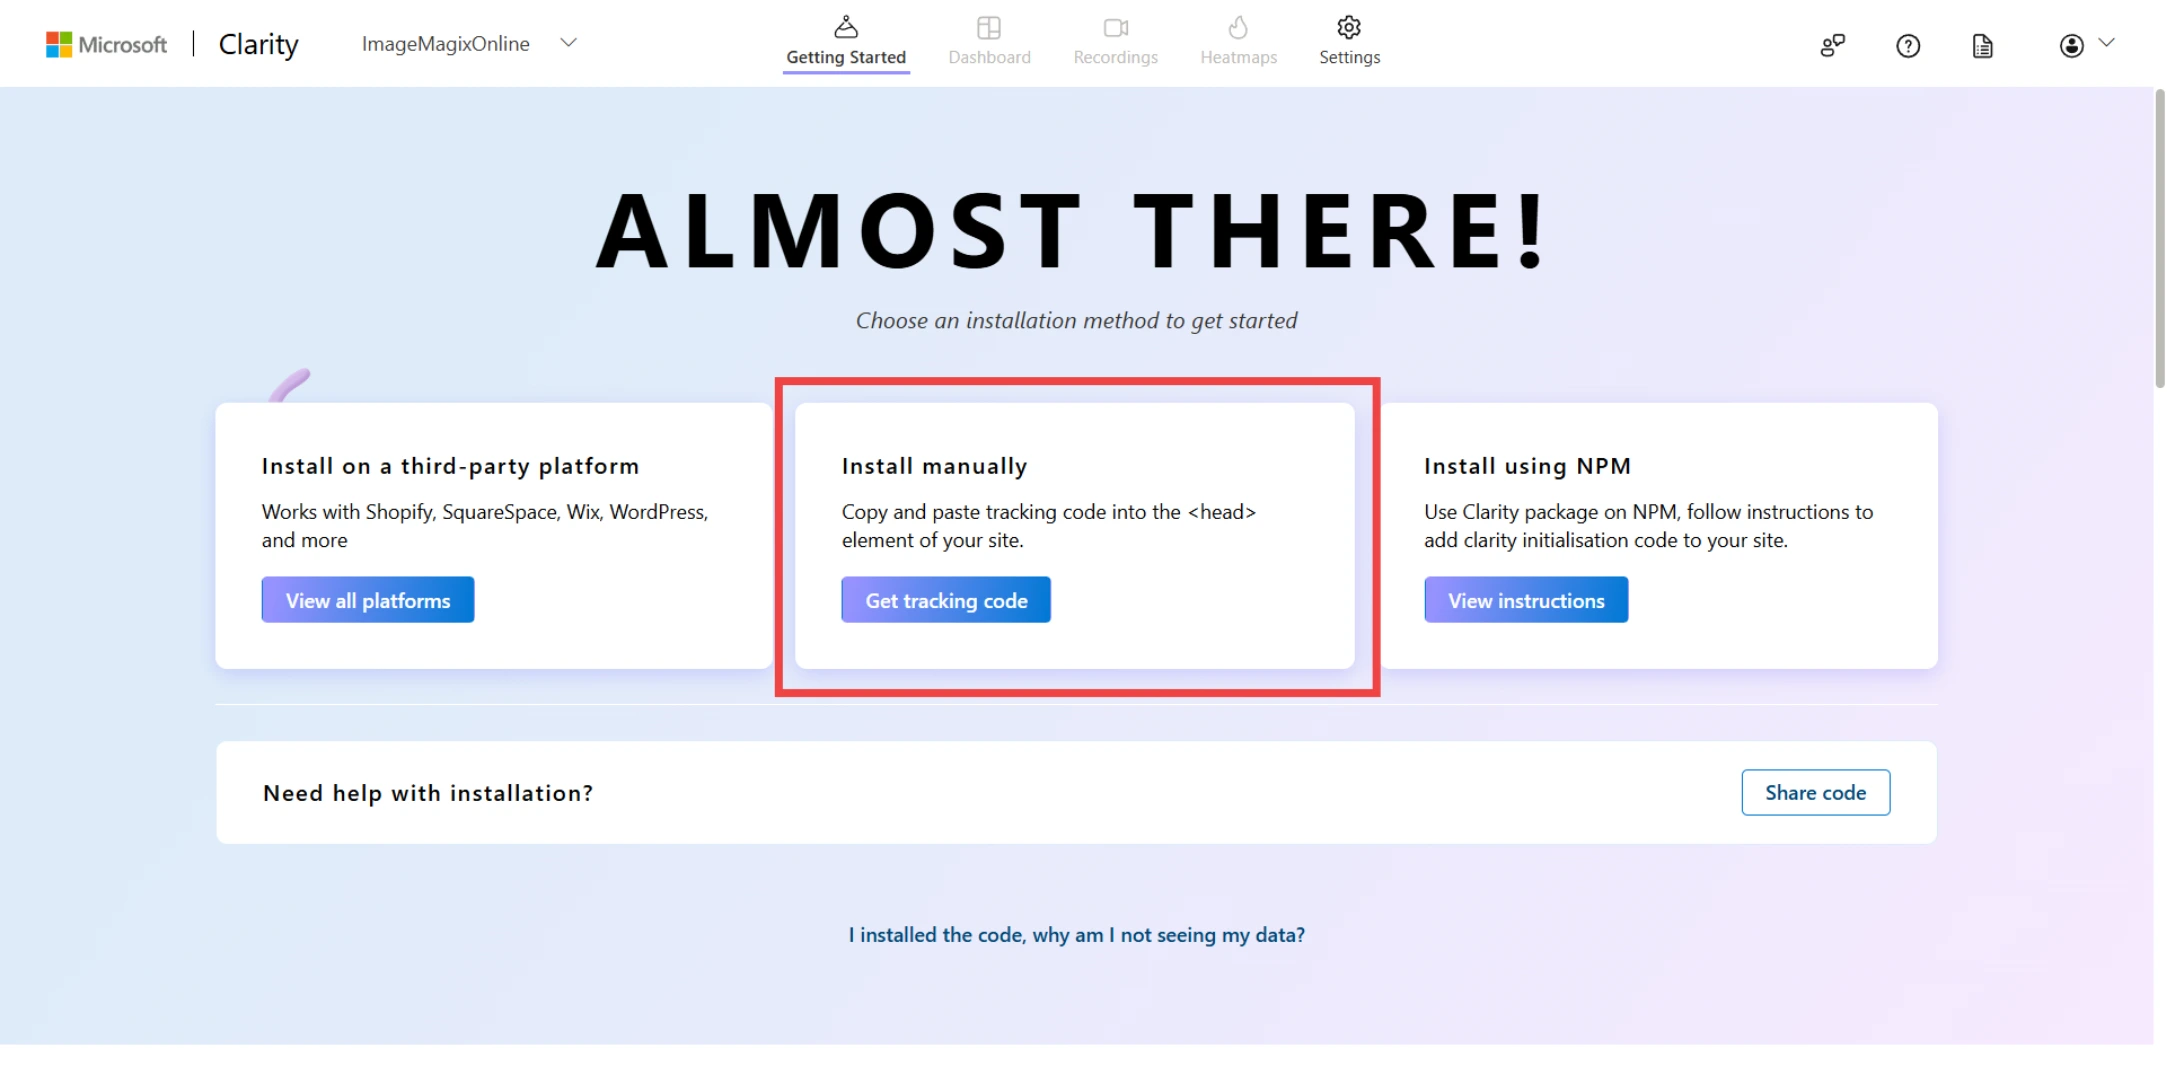
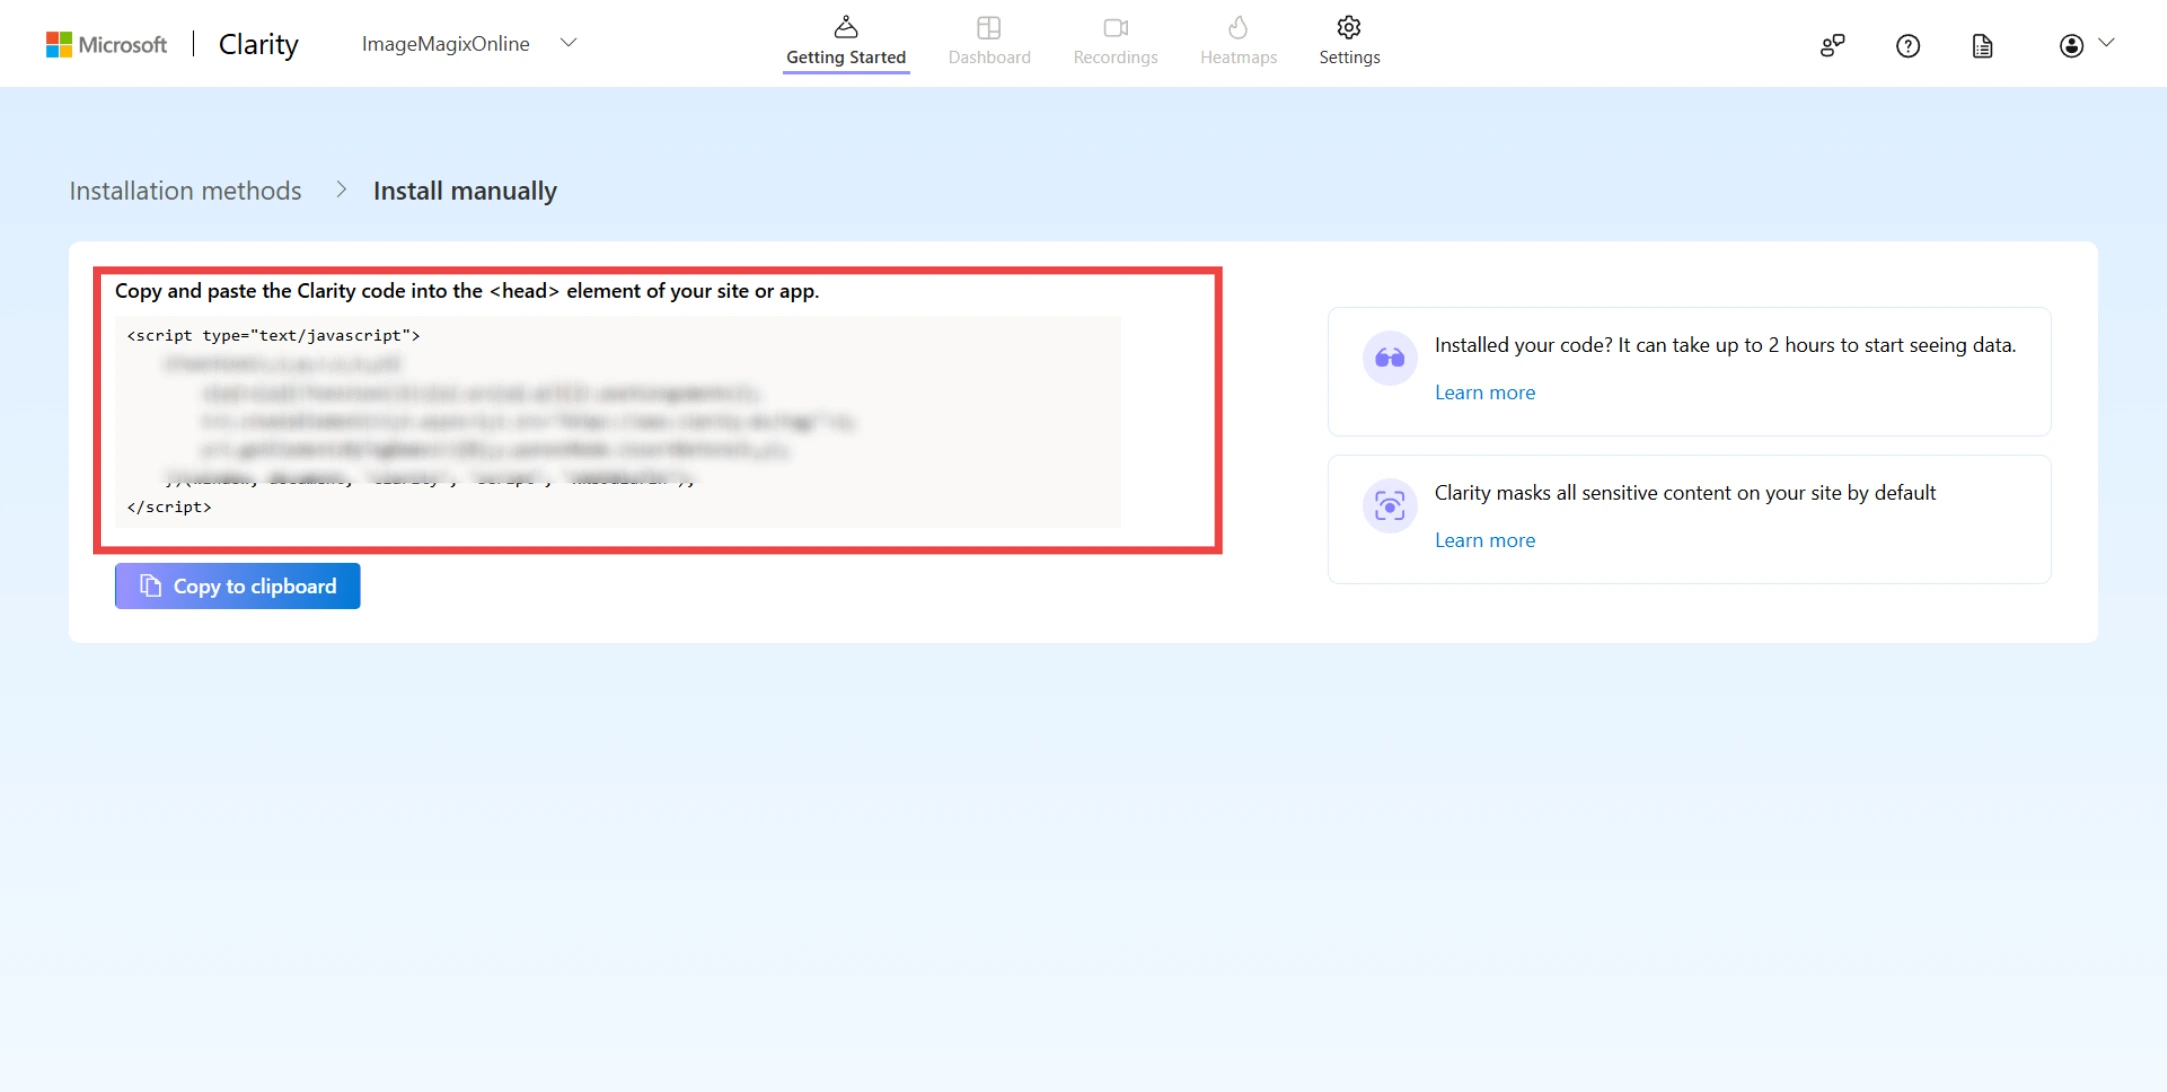
- A popup window will now display a block of JavaScript. While it might look intimidating if you are new to web development, you actually do not need to copy this entire JS script.
- Look very closely at the very last line of the code snippet. You will see a short, 10-character alphanumeric string encased in quotes (for example,
xkb9d1u7lh). - Carefully copy this string. This is your unique Project ID, and it is the only piece of information we need to bring into our Next JS project.
6. Step 3: Integrate Microsoft Clarity into Next.js (The Right Way)
Now that we have our Project ID, it is time to write some code. As mentioned earlier, a common and fatal mistake developers make when they set up site analytics is pasting the raw script tag directly into their root HTML.
If you read through the Next JS docs, you will find that Vercel strongly advises against raw
<script> tags for external analytics. Instead, we must use the optimized next/script component.Open your code editor and navigate to your root layout file (
src/app/layout.tsx if you are using the App Router). Here is the exact, optimal way to inject the tracking code into your Next JS site:tsximport type { Metadata } from 'next'; import Script from 'next/script'; // 1. Import the highly optimized Script component import './globals.css'; export default function RootLayout({ children }: { children: React.ReactNode }) { return ( <html lang="en"> <head> {/* Other head elements, meta tags, and fonts go here */} {/* 2. Add Microsoft Clarity Tracking */} {/* Critical: We use NODE_ENV so it doesn't track your local development clicks! */} {process.env.NODE_ENV === 'production' && ( <Script id="microsoft-clarity" strategy="afterInteractive"> {` (function(c,l,a,r,i,t,y){ c[a]=c[a]||function(){(c[a].q=c[a].q||[]).push(arguments)}; t=l.createElement(r);t.async=1;t.src="https://www.clarity.ms/tag/"+i; y=l.getElementsByTagName(r)[0];y.parentNode.insertBefore(t,y); })(window, document, "clarity", "script", "YOUR_PROJECT_ID_HERE"); `} </Script> )} </head> <body> {children} </body> </html> ); }
Why this is the perfect implementation:
- The
strategy="afterInteractive"Property: This is the magic bullet. By setting this strategy, we are explicitly telling Next.js to wait until the primary page content has been fetched, rendered, and is fully interactive for the user before it bothers downloading the Clarity tracker. This ensures a lightning-fast initial load time. - The
process.env.NODE_ENV === 'production'Check: When you are actively writing code and testing things onlocalhost, you will naturally click around your own site hundreds of times. By wrapping it in this condition, tracking only activates on your live Vercel website.
Make sure to replace
"YOUR_PROJECT_ID_HERE" with the exact ID you copied back in Step 2!7. Step 4: Execute Your Next JS Deploy on Vercel
With the code written and saved, the final step is to push it live to the world. If you want to deploy next js, the absolute best hosting provider is Vercel (the creators of Next.js). A Vercel app deploy is incredibly simple and fully automated through Git.
Open your integrated terminal and run the following standard git commands to push your commit to your remote repository:
bashgit add .
git commit -m "feat: integrate Microsoft Clarity analytics tracking"
git push
If you have already connected your GitHub repository to Vercel, pushing to your main branch will automatically trigger a next js deploy.
You can log into your Vercel dashboard to watch the build process. Vercel will compile your React components, optimize your images, and deploy your edge functions. The entire next js deployment typically takes less than two minutes.
Once the vercel deploy app process succeeds, your Next JS app update will be live on the internet! It is highly recommended that you navigate to your live production URL, browse a few pages, and click a few buttons just to generate some initial test data for Clarity to process.
8. Step 5: Reviewing the Clarity Dashboard
Microsoft Clarity processes data surprisingly fast. After your next deploy goes live and you or your users generate some traffic, you can head back to the Microsoft Clarity dashboard. Within 1 to 2 hours, you will start seeing real, actionable data populate your screen.
Here is an example of what the Clarity Dashboard looks like once it starts capturing live user recordings:
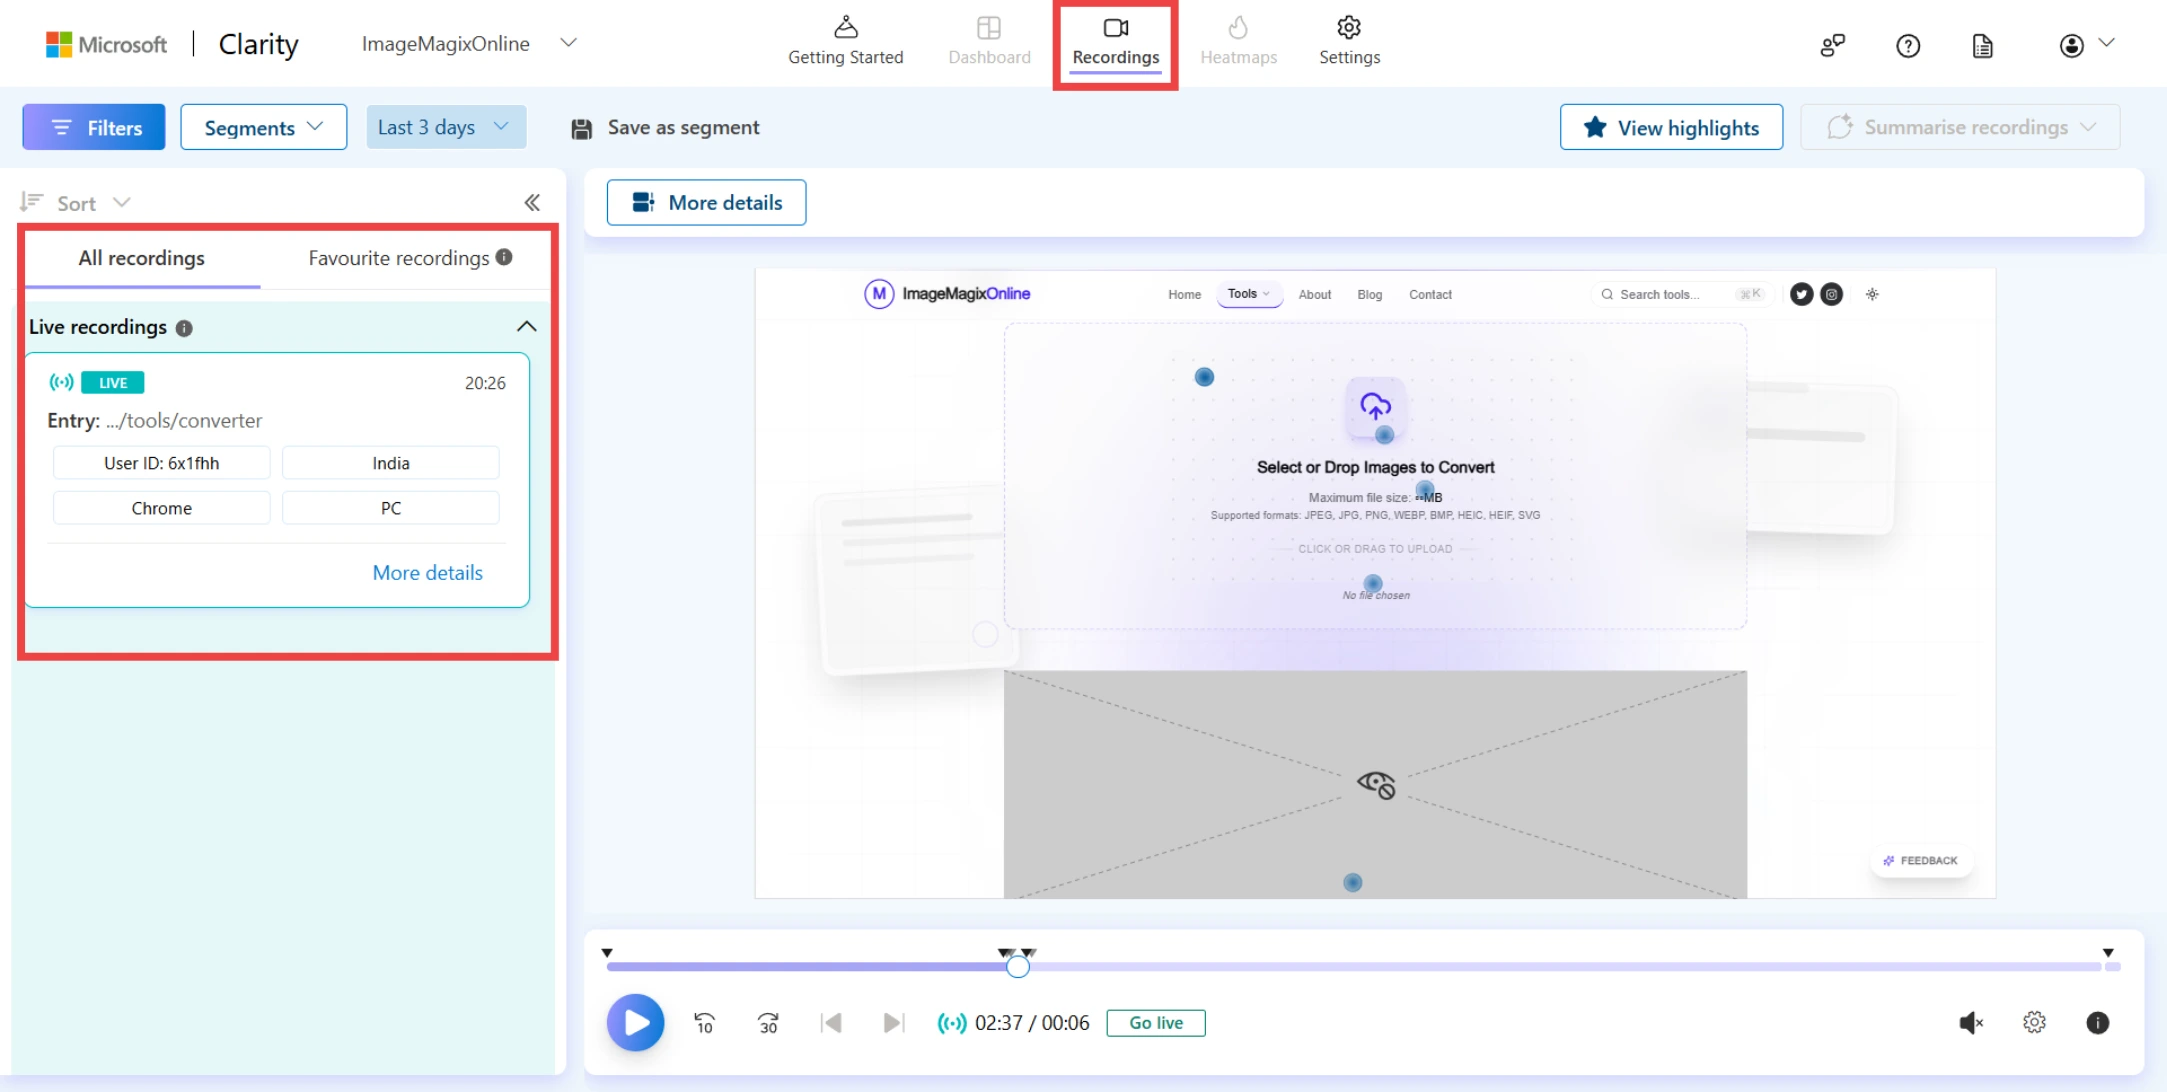
On this dashboard, you will have access to:
- Session Recordings: Watch actual video playbacks of users navigating your vercel site. You can see exactly where they move their mouse, where they hesitate, and what content they skip over entirely.
- Heatmaps: Generate instant visual heatmaps showing the most clicked elements on any given page. This is incredibly useful for validating if your Call-To-Action (CTA) buttons are positioned correctly.
- Dead Clicks & Rage Clicks: Identify broken elements immediately. If 50 users are repeatedly clicking a static image thinking it is a link, Clarity will flag it as a "Dead Click," allowing you to jump in and fix the UX flaw.
By actively monitoring these metrics on your next js vercel deployment, you can make data-driven decisions that drastically improve website conversion rates and customer satisfaction.
9. Conclusion — Your New Analytics Superpower
Congratulations! You have successfully mastered the art of integrating Microsoft Clarity into your Next JS by Vercel infrastructure.
While raw traffic numbers are helpful, behavioral analytics are what truly separate amateur websites from professional web applications. Stop flying blind and guessing what your users want. By actively reviewing how visitors interact with your app vercel deployment, you can eliminate confusing layouts, remove friction from your UI, and drastically enhance the overall user journey.
If you are looking to further optimize your website's technical performance and SEO, be sure to check out our Free Website Image Audit Tool. It will instantly scan your entire domain to detect hidden SEO errors, missing alt tags, and oversized images that are slowing down your load times!